Saturday, September 14, 2013

Restoring old leather

This holster came to me via a little horse trading, fitting I suppose. $5 grips picked from the bargain bin and resold at a 800% profit got me enough spending loot to pick up this worn but incredibly detailed western holster:


I estimate it to be 60's vintage, the hand tooling is impressive- I can't imagine what it would cost to duplicate in todays dollars. It looks to be made for a 4-1/2" to 5-1/2" Ruger single six or Colt new frontier (or scout)- the loops are definitely for .22 rounds. When I received it, I got to work gussying it up with 2 products: Kiwi black shoe polish and Neatsfoot oil. Using an old toothbrush I scrubbed in the shoe polish to any places where the tooling or age had worn away the dye (cows are not black) and let it sit. Then I rubbed it in and polished it out. Afterwards I rubbed in about 3 coats of neatsfoot oil which is a leather preservative. This stuff is made from boiling down the shin and foot bones of cows which have a special kind of fat to keep cow ankles from freezing...seriously. It works real nice on any thirsty leather and is pretty cheap and easily available. Here's a half and half photo (polished and oiled on the right):

And the finished product, it's really night and day from how I received it:


Saturday, September 7, 2013

Ol' Rusty

In your lineup of firearms there is always one that pulls the shortest straw, and is the first to go when something new and shinier comes along. In this instance, I was frustrated because I could not personally get along with the Ruger speed six (project detailed below). Though I carried it in the winter, I never was able to shoot it as accurately as I prefer. It was time to find it a new home where it would hopefully get along better with it's new owner. I worked out a trade locally for a poor neglected S&W 66-1 that looked like hell. I know I can shoot the 4" K frame platform well so I took a chance. The stainless had rusted and pitted severely- Yes stainless can rust if not taken care of. It had a nice trigger and Ahrends grips which needed a refinish. I took it to the range and it shot and handled nicely, but the heavily pitted yoke concerned me so I didn't put any 357's through it. [click on the pics to make them bigger]


Here are some pics showing the condition as I received it. Probably the worst looking stainless gun I've ever seen.


I've always been pretty good at sniffing out a diamond in the rough, so I got to work. Thanks to Ebay and Gunbroker I sourced a replacement yoke and cylinder in much better condition, total investment $70. I had to send back the first yoke because there are two different styles and apparently I have the less common one which is a little thicker up top. Here is a comparison pic of the cylinder:
 
 
After receiving the parts, I stripped the revolver down to screws and springs and bead blasted the entire thing. Here's where things went haywire. I read that the stainless must be allowed to repassivate- which means the outer layer of molecules exchange iron for chromium and form a protective layer. So I covered the rinsed parts in Bartenders friend which contains oxalic acid (I've used this particular acid to bleach wood in the past) which is supposed to speed up the passivation process. Well- it stained the stainless (which was looking quite nice beforehand) and made it look awful. My patience was wearing thin, so I took the parts and re beadblasted them and then immediately rinsed them and soaked them in CLP. I have some citric acid on order which is used commercially to passivate metals, so later on I will do a stain test and possibly strip the gun down and boil it in the dilute acid. Here are the after pics, the finish is very similar to the factory S&W blasted finish on the Performance Center guns:   [click on the pics to make them bigger]


I'm pleased with how it came out. I threw on the Herrett cocobolo grips that were living with my Model 18, because I like the Orange/gray color combo. Range report soon...
 

Monday, September 2, 2013

Rust bluing at home

The object of this endeavor was to give the revolver discussed below a durable, consistent finish without obliterating the character or original stampings. Rust bluing was the original firearm finish, it is so labor intensive though, that "Hot" bluing was invented to replace it. Hot bluing involves caustic chemicals that will seriously hurt you and eat through anything, but give a quick and attractive finish. After imagining my daughter finding a bucket of salts and it eating through her arm like Alien blood, I decided to try rust bluing instead. It is a more durable finish than hot bluing, but not quite as shiny.

This firearm came to me with a patchy, inconsistent and worn patina which is fine but I think it deserved a new lease on life. I shot it once with the thin grips it came with and struggled with accuracy. As I begun the refinish, I dug through my parts and came up with a period correct set of diamond magna grips and nicely case colored trigger. In addition I sourced a hammer of the correct design, as this particular kind was only made for a couple of years.

First order of business was to strip the original bluing, so a soak in regular vinegar to remove the remaining bluing.

Then a bead blast with fine glass particles to clean the rest of the crud off and give a proper tooth for the bluing to stick.


I then boiled the parts in degreaser to leech out any oil left behind, greased the bore and chambers and a quick wipe with acetone.

For this process I used Brownell's "Classic rust blue", swabbed on with cotton balls held in forceps. Small parts such as screws and the thumb latch were boiled in the stainless contraption shown in the picture (flea market buy- could be used for tea or something originally?)


After the parts are cleaned and degreased thoroughly, the bluing solution is swabbed on, left to dry for an hour, then swabbed on again. The parts are left to sit and rust in a humid environment for 24 hours.


This leaves a coating of red oxide (rust) on the parts, the next step is to boil them for 30 min converting the red oxide to black oxide. I used stainless steel wire and a dowel to suspend them in the stainless pot (pot sourced at local Goodwill for $5, later found to be a $200 French stock pot 0_o)


Very shortly after hitting the boiling water the parts begin to turn black. After the 30 min of boiling, I took them out and flash dried them with a hair dryer.

The parts are covered in a velvety black substance that needs to be "carded" off. I used 0000 steel wool and it took about 2-1/2 hours to card the parts to my satisfaction each time. The solution is then applied again and the parts are allowed to rust for another 24 hours. I repeated this process 6 times total, each time the bluing got darker, shinier and more homogenous. Here are some pics of the rusting in action:


 At this point I had over 20 hours invested. The steel wooling process is extremely tedious- I can't say I would recommend this process unless you are very patient and dedicated. Needless to say, I was overjoyed once the week had passed and I could start wrapping it up. Here's what everything looked like after the final carding:

I soaked the parts in a baking soda and water mixture to neutralize the bluing chemicals.Then a 2 hour boil in used motor oil (the carbon in the oil bonds to the freshly blued surface imparting more durability), left to cure for 22 more hours in the oil. This was the hardest part, I wanted to see it done!


After removing the parts, cleaning thoroughly and spraying down with eezox (rust preventative and lube) I reassembled with the new hammer and trigger. I also replaced the extremely worn hand that was contributing to some carry up issues (see post about carry up somewhere below)

Here are some before pics:


Note the patchy brownish finish and black rusty condition of the hammer and trigger. As a side note, I had considered re-case hardening the hammer and trigger, but it requires a forge capable of 1400 degrees (and a pyrometer to check it) which I do not have. maybe sometime in the future I will build one.

Here is the finished product:


You can see the finish is sort of a bluish black satin color, shinier than the matte finish of a model 28 and just a bit duller than the low polish of my 38/44 outdoorsman. The hammer and trigger have nice blueish purple and straw colored case hardening and the revolver is now wearing the correct post war diamond magnas (much easier to hold on to). You can still see the various dings and wear that I did not sand out of the metal, but is bothers me less than the rounded edges and scrubbed stampings would (The pictures show quite a bit of lint from wiping it down). I took it to the range today, and I shot it pretty good for a fixed sight revolver. It is very light and handy, the trigger is exceptional in SA and DA. Here's some targets I shot at 10 yards offhand (4" of black): There are six shots on the left target, can you spot the last one?


Overall a satisfying project, but I don't think I would do a whole revolver again, maybe a rifle barrel or slide perhaps?


Saturday, August 31, 2013

Pre-model 10 Mystery

Finally reached the end of the bluing process for the pre-model 10. Assembly pics will be posted soon- In the meantime I'd like to discuss the history of this interesting revolver.


During the process of looking for a pre-war or Victory model K frame in 38sp, I came across this pre-model 10 for sale (to be exact a "M&P model of 1905, transitional") for a very reasonable price. I normally wouldn't jump on something like this, however the stampings on the latch side intrigued me and I couldn't pass up a good mystery.

 
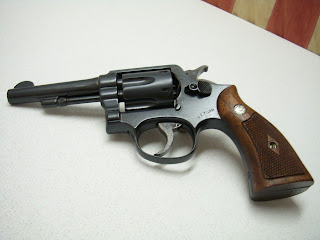
After receiving the firearm from my FFL, I began to research the meaning of the markings and date of manufacture. This revolver was made in 1946, just as Smith and Wesson was transitioning back to civilian production. The Kanji markings as illustrated below-
 

roughly translate to "East (capital) Public (safety)" (thanks to the folks at Sigforum for help with the translation). Tokyo is otherwise known as the east capital (Kyoto being the old capital of Japan). I could not find any other records of revolvers marked as such, but my feeling based on the evidence is that these were sidearms lent or issued to the police forces in occupied Tokyo while being overseen by the Americans. The history of modern Japan is an interest of mine, esp. after the (happy) mistake of signing up for a grad level history course on the topic in college. The occupation was a very interesting time, considering how the two sides managed to cooperate and put the pieces of Japan back together in such a relatively short period of time.

This particular revolver has been around almost twice as long as I have and has seen a lot of things, I'm sure. The condition is worn but not abused- The finish is patchy but not pitted, I will discuss the refinish in the next post.

Monday, July 15, 2013

Previous project #2

This revolver has become my favorite. It comes with me to the range just about every time. The trigger is butter smooth and it is otherworldly accurate- like the hand of God reaches down and personally guides each bullet. It is a S&W 38/44 Outdoorsman from 1953, I traded a .22 rifle for it to a gentleman in Oregon. The finish leaves a lot to be desired and it came with some carry up issues (more on that later), but it's a strong example of some of Smith's finest work.


I made the trade aware of the issues and decided to ignore the bluing wear and concentrate on fixing the failure to carry up. What this means is that the cylinder stop does not click in to the recess in the cylinder when the hammer is cocked slowly. The revolver will usually function fine in normal use due to the speed and inertia of the cylinder and the self centering action of the forcing cone (tapered portion of the barrel before the rifling starts). The carry up issue is usually dealt with by replacing the "hand" (see below, blue punch is pointing at it)


When the hand is worn it does not push the ratchets on the ejector star enough to lock the cylinder into place. (ejector star below)


If the hand is especially worn, a direct replacement may solve the issues. In some instances an oversize hand is called for, which is wider and the left side of the frame window is filed to fit.

In my revolvers case the ratchets and the hand were not especially worn. After spending many hours working the action and going through the S&W "Bible": http://www.midwayusa.com/Product/314178/the-s-and-w-revolver-a-shop-manual-book-by-jerry-kuhnhausen

I came to the conclusion that something very out of the ordinary was going on, here is what I found.


This is what's known as the "rebound slide". It performs a variety of things (two internal safeties and providing trigger return tension) There is a spring inside as well as a guide pin. Later N frames do not have this pin. By removing the pin the problem was temporarily solved. After assembly and disassembly a dozen times checking the fit, the pin was just a hair too long and binding the action. I stoned approx. 1/64" off the length, deburred it and reinstalled. Problem solved. I may come back to this gun as there is also some push off issues with it as well (push off is when the hammer is cocked and thumb pressure "pushes" the hammer off the notch allowing it to fall without the trigger being pulled). It's not horrible, as it takes a strong thumb to make it happen- however it is a issue to me because I feel tools should operate correctly.

Below is a picture with a younger brother (38/44 is top one, 27 on bottom) showing the fantastic sambar stag grips I found on gunbroker. Listed as "Sabre stage gripes", they were listed with an very low buy it now. Dyslexic seller = big score for me.  Sambar stag has really started to go up in price as the flow from India has virtually disappeared. Elk stag is nice (27 in the pic wearing elk stag) but the sambar is so rich it's on a different level.


The 38/44 is a strange bird. It's a .44 frame meant to shoot a high velocity .38 that was the predecessor to the .357. These days it's an anachronism, a huge revolver chambered in .38 special, who'd want to shoot that? I do, all the time in fact.


Sunday, July 7, 2013

Previous project #1

     It takes a certain amount of confidence in your work to take something apart, put it back together again and light off 35,000 pounds of pressure in your hand. Luckily, my first project was a simple Ruger DA revolver. A Speed Six I had picked up for a very reasonable price because the finish was freckled, it cleaned up nicely with some 0000 steel wool and eezox. I had owned a GP100 that did little for me, but because of the full frame the "six" series seems to balance much better. They do not exhibit the fine craftsmanship of the older smiths, however. This was to be a winter carry/beater, and it has worked nicely.


This is what I started with. Grips were horrendous in the hand, finish at this point was acceptable. Won an auction for a lot of NOS grips and modified the least attractive pair to be as short as possible- finish is Tru oil.


Found a factory bobbed hammer from Numrich and installed it. The Ruger DA revolvers are extremely simple to disassemble, there is no sideplate just take the grips off, remove a pin and everything pretty much comes apart.

Next, I added a tritium night sight repurposed from a SP101. This one is a meprolight and needed to be drilled for a locating pin. 1/16" punch to remove the old over an armorers block, drill from both sides and drive in the reused roll pin.


So: new bobbed hammer, night sight and grips. After reselling the unused grips from the lot, it covered the cost of the modifications. Carried OWB in Lobo leather it disappears under a coat. 357s are manageable, but I keep it loaded w/ 38sp +P. I do not shoot it as accurately as my smiths, but it is good enough.


step 1

I'm going to use this space to keep track of the successes and mistakes I've made in this hobby of mine. As much as I enjoy shooting, I am a tinkerer by nature and enjoy metalwork, finishing and woodwork. My plan is to document a few past projects and then update the current project I'm working on, a 1946 Tokyo Police S&W M&P for my daughter.